Step by Step: How to Use MS Excel ‘Transpose’ and convert Columns to Rows
MS Excel Transpose convert columns to rows::What is the Use of ‘transpose’ and how to use it for converting Columns to Rows or rows to columns? Let us say that we have the below table:
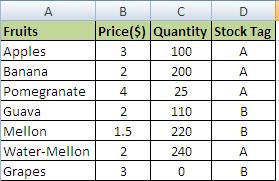
MS Excel Transpose-1
We want to change the “fruits” column to a row so that information view is changed. Let us assume that we want the below table style using Transpose:

MS Excel Transpose-2
It is very easy to perform the above transpose task in MS Excel 2007, 2010. The detailed use of Transpose is placed below for ease of use and understanding:
Step 1: converting excel columns to rows
Copy the entire table.
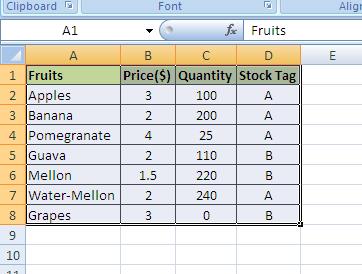
MS Excel Convert Column to Rows-3
Step 2:converting excel columns/rows to rows/columns
Click the cell where you want the transpose to occur; in this case we have selected A11 cell.
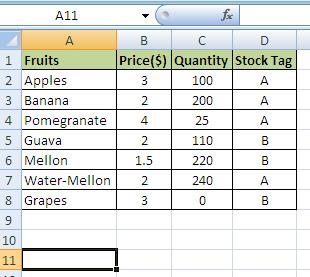
MS Excel Convert Rows to Columns-4
Step 3: Convert MS excel columns to rows
Right Click and Choose “Paste Special”

MS Excel Converting Columns to Rows-5
Check the “Transpose” check box: and click “OK”.
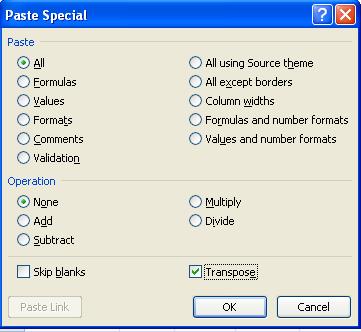
MS Excel Transpose rows and columns-6
That’s it: clicking the “OK” button would convert the columns into rows. The same process can be used to convert and change rows to columns and vice versa. The below final result picture displays both the actual table and converted table with the use of Transpose function in MS Excel 2007 2010.
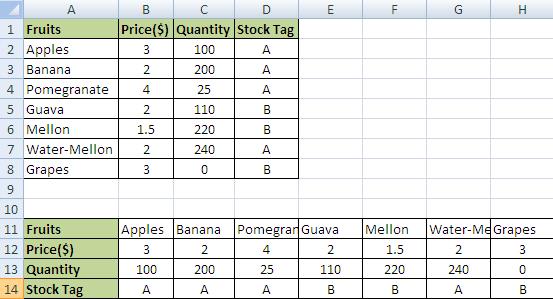
MS Excel transpose columns to rows-7
Tips for Using MS Excel Transpose Function:
1) While transposing it is better to check the “Values” box because it would save you from unmatched formulas and unnecessary errors.
2) The formatting can be kept or it might be dropped.
3) Always select a new worksheet for transposing because it would keep your original table in the backup.
